Cheap and easy deployment: CaptainDuckDuck (Part 2)
Welcome back! Let's deploy your own personal PaaS step by step with CaptainDuckDuck.
Welcome back to this two-part article about CaptainDuckDuck! In this second and last part, I will take you through the process of how I deployed my own PaaS using CaptainDuckDuck to host this personal website and blog. Sounds hard? Actually, not so much!
If you missed on Part 1, be sure to check it out before reading on. Let's get started!
Disclaimer: I have no personal interest whatsoever in the brands and businesses mentioned in this article, namely OVH, Heroku and DigitalOcean. They are only mentioned for the sake of illustration.
Refresher
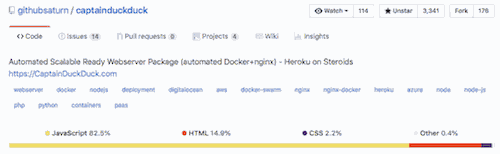
As a quick reminder, CaptainDuckDuck is an open source system that allows you to run your own Heroku-like PaaS. It takes advantage of standard tools such as Let's Encrypt, Nginx and Docker to relieve the pains of deployment.
![]()
Here's what we'll cover:
- Getting a server and a domain name
- Installing and launching CaptainDuckDuck
- Managing apps in the web interface
Ready? Let's get down to business!
Get a server and a domain name
Although CaptainDuckDuck can run locally if you do some extra configuration, it's primarily meant for production, which means you need a server to run it on.
Also, because CaptainDuckDuck routes your apps on subdomains (e.g. blog.mydomain.com or api.mydomain.com), you'll also need to own a domain name and attach it to your server.
Even though you have to purchase these, fortunately a server and a domain name is all you'll need to run your apps with CaptainDuckDuck.
Let's start with the domain name. I bought one for 10€/year at OVH. It's not the most elaborate provider out there, but OVH's domains are simple, functional and reliable.
As for the web server, I obviously chose to go for the Cloud. And, well… there are many cloud providers out there. I decided to go with DigitalOcean's droplets*. I bought a 1GB RAM server for just \$5/month (50€/year), which turned out to be just enough to run my two apps, a Postgres database and all of CaptainDuckDuck's machinery.
In the end, I get away with a 60€/year setup, which fits my budget and cuts my costs 4X compared to deploying on Heroku. 💶
*Interestingly enough, CaptainDuckDuck's documentation also mentions DigitalOcean. Be sure to check the docs out for optimal instructions about setting up your droplet to host CaptainDuckDuck if you choose this provider.
Now that we have a server (and figured out the details to connect to it via SSH — which very much depends on your provider), let's install CaptainDuckDuck on it.
Install CaptainDuckDuck
The CaptainDuckDuck official Getting Started guide actually contains all the information you need to install CaptainDuckDuck on your server. Be sure to check it out; I will just say a few things about it here.
To me, CaptainDuckDuck's philosophy boils down to: "no bullsh*t". However, there are some rather manual steps needed to initiate the CaptainDuckDuck installation. The very first step is to start CaptainDuckDuck's Docker container:
mkdir /captain && docker run -p 80:80 -p 443:443 -p 3000:3000 -v /var/run/docker.sock:/var/run/docker.sock dockersaturn/captainduckduck
The next step is to configure your DNS provider. As per the docs, your wild-carded root domain needs to point to your server. On my side, I went on my domain's DNS configuration on OVH and created a new A record to point *.florimondmanca.com. to my server's IP address.
When this is done, we're back to the land of easy-peasy (phew!). CaptainDuckDuck has a very pragmatic CLI to help you finish the installation process. Let's install the CLI:
$ npm install -g captainduckduck
Yep — that npm is the Node.js package manager! CaptainDuckDuck is actually primarily written in server-side Javascript (a.k.a. Node.js), as shown on CaptainDuckDuck's GitHub repo.
Now that the CLI is installed, we can finish up the setup using the properly called serversetup command. Let's see what it looks like:
$ captainduckduck serversetup
Setup your Captain server

? Have you already installed Captain on your server by running the following line:
mkdir /captain && docker run -v /var/run/docker.sock:/var/run/docker.sock dockersaturn/captainduckduck ? (Use arrow keys)
❯ Yes
  No
Yep, I've already done it. What's next?
? Enter IP address of your captain server: (123.123.123.123)
Easy as Cmd+C/Cmd+V.
You will then be asked to enter a name for your Captain server aaaand… you'll be all set!
That's right! We've just installed CaptainDuckDuck! 🦆🚀
Just so you get the gist, it just took me 15mins to install CaptainDuckDuck on my server. It's that easy!
You can now access any subdomain to verify that CaptainDuckDuck is running. For example, I visited helloworld.florimondmanca.com and was greeted with:
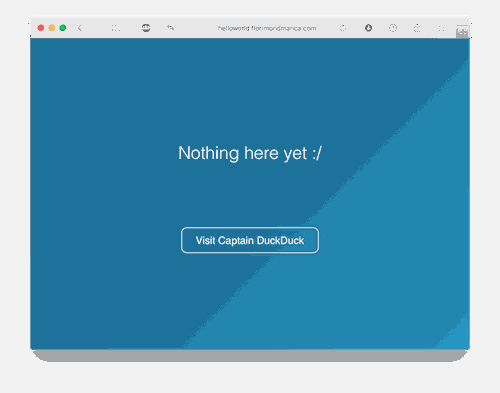
Pretty cool!
(I suppose that the fact it reminds me of Heroku's "There's nothing here yet/Build something amazing" page is not a coincidence, is it?)
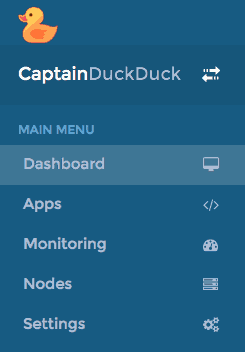
You can now go to your Captain root (in my case, captain.florimondmanca.com) and familiarize yourself with the web UI, which has a few sections:
- Dashboard is more a home page than anything.
- Apps allows you to create and manage apps.
- Nodes explains how to configure a Docker Registry to run CaptainDuckDuck on a cluster of nodes.
- Monitoring allows you to start a NetData metrics collector that will show you live information about your server (incoming requests, CPU and memory usage, etc). It can even send alerts! 🚨 I've configured it to send alerts to a Telegram bot; that's pretty neat!
- Settings is just what you would expect (password reset, etc…) plus the base Nginx configuration and a handy widget to cleanup unused Docker images.
Let's focus on the "Apps" section; this is where most of the CaptainDuckDuck magic takes place.
Manage apps in the web interface
The "Apps" section of the UI allows you to manage your apps — much like you would do on a Cloud provider such as Heroku.
If you open this section, the following form allows you to create a new app.
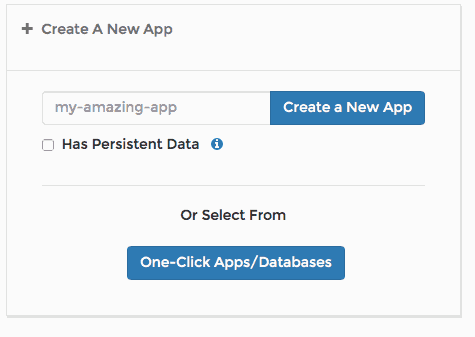
You just need to provide two things:
- The name of the app: an app named
myappwill be accessible onmyapp.yourdomain.com. - And whether it has persistent data, i.e. any data you don't want to lose between app restarts. Internally, this is implemented through directory mapping and Docker volumes. You can read more about this in the docs.
Except for databases, I find it best to use non-persistent apps and store data and files somewhere else. That way, the app can be easily modified or removed without risking data loss. For example, I chose to store uploaded files (mostly photos used for my blog posts) on AWS S3 using the AWS Free Tier.
Configuring SSL has never been that easy
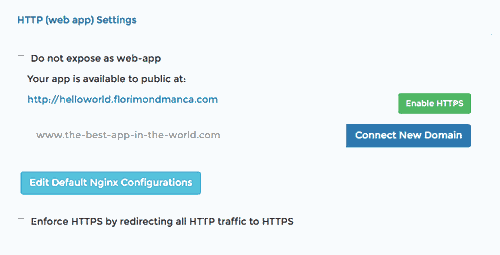
After you create your app, you'll be able to access its management page. First thing you'll want to do: enable SSL.
And, oh my — do you remember the old days of creating, registering and configuring SSL certificates? I do, and I didn't enjoy it. But…
With CaptainDuckDuck, enabling SSL is crazy simple: just click "Enable HTTPS". Tada! ✨🔐
You can just as easily redirect all the HTTP traffic to HTTPS. It's just that simple.
Edit Nginx config right in your browser
I told you — CaptainDuckDuck relies on the tools we all use and cherish. Docker and Nginx are two of them.
Let's focus on Nginx here. Each app on CaptainDuckDuck benefits from its own Nginx configuration file. And you can edit it directly in the browser.
On an app's management page, simply click "Edit default Nginx configuration" and it will display the Nginx configuration CaptainDuckDuck already uses for your app. It contains stuff such as SSL and HTTP/HTTPS redirection.
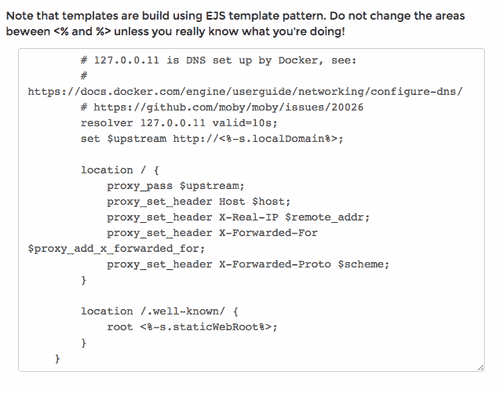
You can add your own configuration pieces right there. Just make sure that your Nginx configuration is syntactically correct! Otherwise, CaptainDuckDuck will crash and you'll have to SSH on your instance and debug on the command line… True story.
Yep, that's not great to be honest. But hey, CaptainDuckDuck is still pretty new! There are tons of enhancements every week, so I hope they'll include an Nginx configuration validator soon to prevent you from doing stupid stuff.
As an example, here are the custom bits of configuration I added for my blog frontend app under the server block listening on port 443:
root /nginx-shared/dist;

# Prevent clickjacking attacks by denying iframe integrations
add_header X-Frame-Options DENY;

# Block if browser has disabled XSS protection
add_header X-XSS-Protection "1;mode=block";

# Disable MIME type sniffing
add_header X-Content-Type-Options nosniff;

index index.html index.htm;

location / {
    try_files $uri $uri/ /index.html;
}
I add some security headers and redirect all requests to Angular's index.html file. Pretty standard Nginx configuration for Angular, but if you're not too familiar with it I really like this tutorial article on using Nginx for static websites.
One last thing that I wish I had known earlier — CaptainDuckDuck allows you to share files between the app container and the rest of your server. More specifically, it mounts /captain/nginx-shared/ on the server as an app volume at /nginx-shared/. This has allowed me to serve a dist folder containing Angular compiled static assets from within the blog app container. I copy that folder on the server during the CI/CD pipeline, but that's for another blog post entirely!
Other honorable mentions
Quick mention of some other interesting features CaptainDuckDuck provides to manage your apps:
- You can configure environment variables directly on the app's management page — I used this to configure the API!
- Same goes for port mappings, which allow you to map internal ports of your container to external ports (made available to the whole interwebs).
Some caveats, though
As you can see, CaptainDuckDuck is packed with features to make your life easier. I think it's really a small revolution in the world of open source deployment tools.
However, there are some caveats you need to be aware of.
CaptainDuckDuck is still quite new. Its initial commit was in October 2017. Although bugs are fixed and features are added on a weekly basis, it could use some tweaks. In particular, the web UI suffers from bugs (although they are purely visual). Also, error handling can be quite loose. I think simply showing a "something went wrong!" message doesn't really empower you, the developer, to try and find the root cause.
As a result, it is not perfect, nor magical. Although it does a lot of things for you (such as handling Docker containers and images, providing app templates and databases, configuring SSL, providing a default Nginx configuration…), in the end there will be some times when you mess up and have to SSH on your server for some good ol' debugging.
This is why I recommend having a basic understanding of how Docker and Nginx work before you start using CaptainDuckDuck for more advanced deployments. These technologies are growing industry standards (if they're not already), so it's a good investiment anyway. You can start by checking out the Docker and Nginx documentation. However, getting started with CaptainDuckDuck is really easy, so fear not!
Skipped: the Captain Definition
After some hesitation, I won't cover the concepts behind the captain-definition file as I think it will be quite reminiscent to those of you who are already familiar with writing Dockerfiles. Also, the official docs are pretty explicit so you should be able to get started quickly. It's a big part of the power behind CaptainDuckDuck, so be sure to check it out!
Conclusion
We have reached the end of our two-part article about CaptainDuckDuck! 🦆
I have tried to convey how excited I am about CaptainDuckDuck. It truly helped me to relieve the pains of deployment while keeping control over my budget and infrastructure.
Despite its minor imperfections, I believe this is a wonderful piece of open source software with great future. It's definitely worth checking out (head to the docs!) if you're eager to automate and streamline your web app deployment process. 💻